
Full Disk Alert in Windows 10 Task Manager
Full Disk Alert in Windows 10 Task Manager
If your Windows 10 Task Manager shows 100% disk usage, something is causing your hard drive to over-work. The good news is, it’s usually not a hard problem to fix.
Before you start troubleshooting, check if it’s a temporary system glicth. You can do that by simply restarting the PC and see if the issue persists.
9 fixes for 100% disk usage on Windows 10
Here are a few fixes that have helped other users resolve their Windows 10 100% disk usage problem. You may not need to try them all; just work your way down the list until you find the one that works for you.
- Disable SuperFetch service
- Update your device drivers
- Check for corrupted system files
- Perform a disk check
- Reset Virtual Memory
- Disable Antivirus Software temporarily
- Fix your StorAHCI.sys driver
- Check the health of your disk
- Switch to ChromeOS
Fix 1: Disable SuperFetch
SuperFetch helps to decrease boot time and make must-load programs more efficiently. However, it has been identified as a potential cause of disk performance issues in Windows 8 and later versions of Windows, including Windows 10. Here’s how to stop this service:
- On your keyboard, pressWindows logo key , typecommand prompt , then selectRun as administrator .

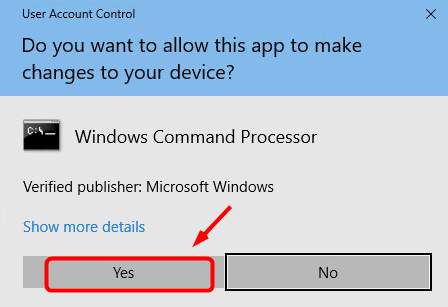
- Click Yes at theUser Account Control prompt.

- The command prompt will once again display. Type in the following command:
net.exe stop superfetch
- HitEnter on your keyboard.
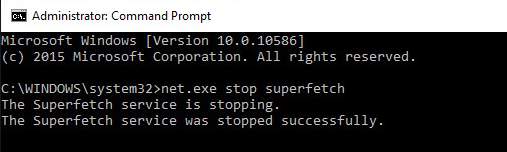
- If the command above isn’t valid, try the following one instead:
net.exe stop sysmain
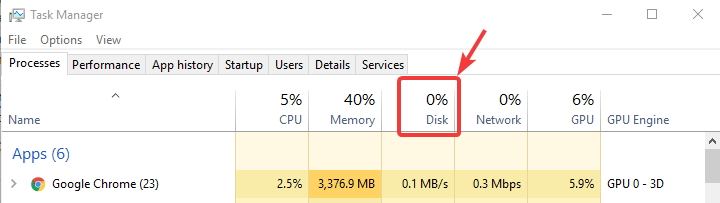
- Wait for a few minutes to see if your computer starts performing better. Or check your computer’s disk usage: Type “task manager” in the Windows search bar and selectTask Manager , then in the Processes tab, look at the % at the top of the Disk column. If it’s no longer 100%, you’ve fixed the problem!

If the 100% disk usage problem persists, try the next method, below.
Fix 2: Update your device drivers
The 100% disk usage problem in Windows 10 could indicate a driver issue. In other words, it could mean that you’re using a faulty or outdated device drivers.
You can automatically update all your device drivers to the latest correct version with Driver Easy .
Driver Easy will automatically recognize your system and find the correct drivers for it. You don’t need to know exactly what system your computer is running, you don’t need to risk downloading and installing the wrong driver, and you don’t need to worry about making a mistake when installing. Though Driver Easy is a paid software, it offers a 7-day free trial so you can be sure it’s right for you.
With Driver Easy, updating drivers only takes 2 clicks:
- Download and install Driver Easy.
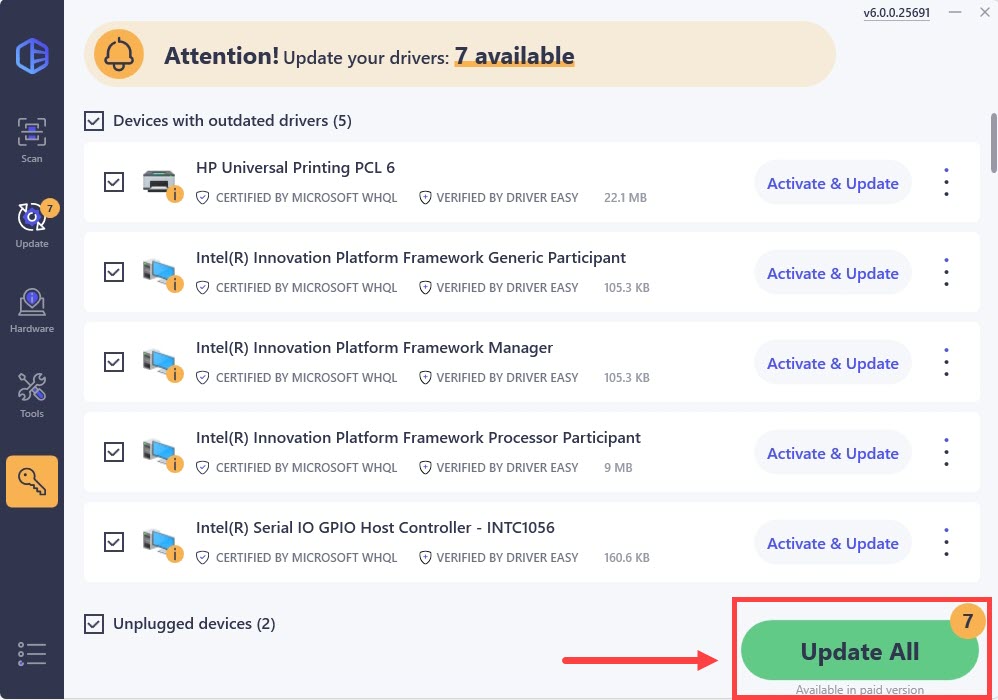
- Run Driver Easy and clickScan Now button. Driver Easy will then scan your computer and detect any outdated or faulty drivers.

- ClickUpdate All to automatically download and install the correct version of**all** the drivers that are missing or outdated on your system (this requires the Pro version – you’ll be prompted to upgrade when you click Update All. You can opt for the 7-day free trial, or you can go Pro now at a discounted price).
- Check your computer’s disk usage: Type “task manager” in the Windows search bar and selectTask Manager , then in the Processes tab, look at the % at the top of the Disk column. If it’s no longer 100%, you’ve fixed the problem!

The Pro version of Driver Easy comes with full technical support . If you need assistance, please contact Driver Easy’s support team at [email protected] .
If the 100% disk usage problem persists, try the next method, below.
Fix 3: Check for corrupted system files
Corrupted or missing system files can also cause the 100% disk usage error. To see if this is the cause for you, run a system scan to detect broken system files with Fortect .
Fortect is a professional Windows repair tool that can scan your system’s overall status, diagnose your system configuration, identify faulty system files, and repair them automatically. It gives you entirely fresh system components with just one click, so you don’t have to reinstall Windows and all your programs, and you don’t lose any personal data or settings. (Read Fortect Trustpilot reviews .)

Here’s how to use Fortect to check for broken system components in just one click:
1)Download and install Fortect.
Open Fortect and run a free scan on your PC. (This may take a few minutes and you’ll get a detailed report of your PC status after this.)
You can review a summary of the issues detected after the scan. ClickStart Repair to start the repair process. (This requires the full version – which comes with a 60-day Money-Back Guarantee.)

The Pro version of Driver Easy comes with full technical support . If you need assistance, please contact Driver Easy’s support team at [email protected] .
Restart your computer to see if you still get the 100% disk usage error. If you do, please try the next fix below.
Fix 4: Perform a disk check
- On your keyboard, pressWindows key andX at the same time, then chooseCommand Prompt (Admin) .
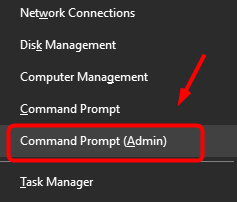
- Click Yes at theUser Account Control prompt.
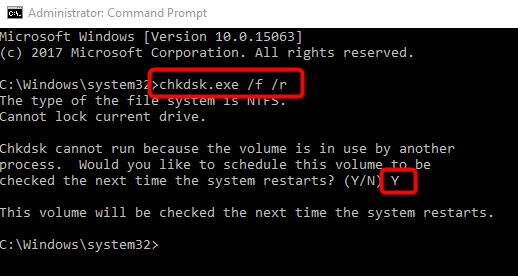
- The command prompt will once again display. Type in the following command:
chkdsk.exe /f /r
- HitEnter on your keyboard, then typeY to confirm that you’d like to perform the disk check the next time you restart your computer. Please make sure you have closed all of your applications first.
IMPORTANT: Disk check will start the next time you boot your PC and it might take some time to complete (could be a day for some). If, when you restart, you don’t have time to wait for the disk check to complete, you can skip it. You’ll need to reschedule it again, as described above, though.
- Once you’ve completed the disk check, check your computer’s disk usage again: Type “task manager” in the Windows search bar and selectTask Manager , then in the Processes tab, look at the % at the top of the Disk column. If it’s no longer 100%, you’ve fixed the problem!
If the 100% disk usage problem persists, try the next method, below.
Fix 5: Reset Virtual Memory
Virtual memory can be considered an extension of your computer’s physical memory. It’s a combination of RAM and a portion of your hard drive. When the RAM isn’t enough to perform a task, Windows will temporarily store files in virtual memory, then swap them back to RAM when required.
To reset virtual memory:
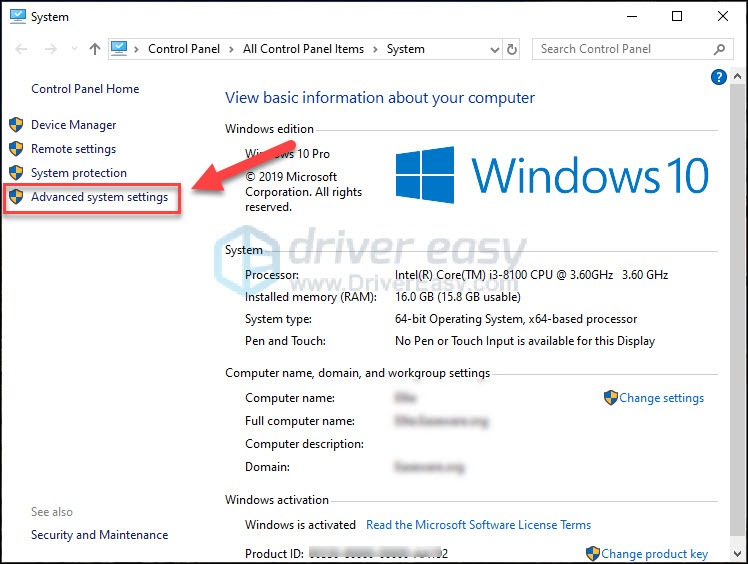
- On your keyboard, pressWindows key andPause/ Break key at the same time. Then choose Advanced System Settings on the left panel.
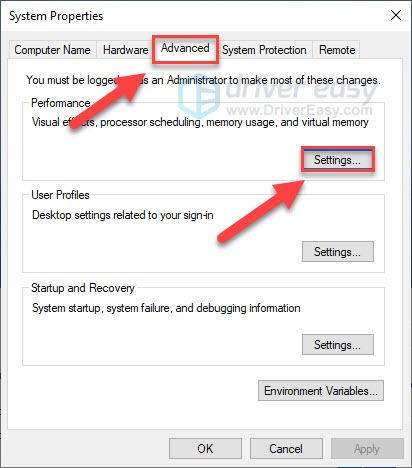
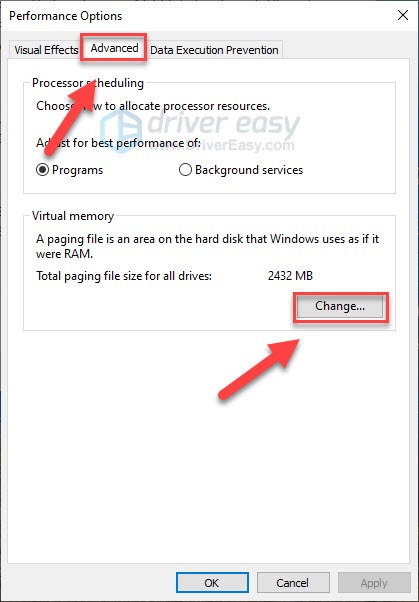
- Go to theAdvanced tab, then click Settings .
- Go to the Advanced tab again, and chooseChange… in the Virtual memory section.
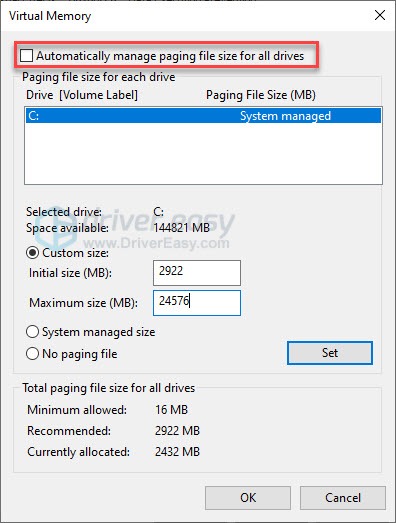
- Ensure the Automatically manage paging file size for all drives checkbox isNOT ticked.
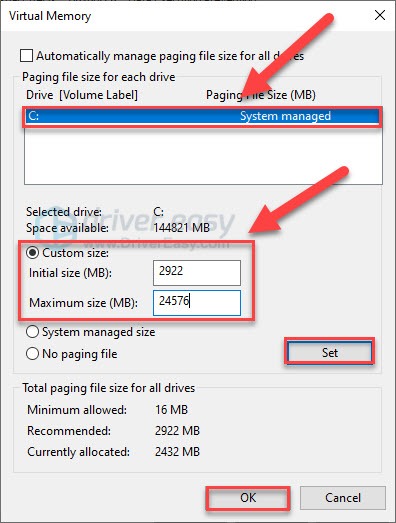
- Select your windows drive (the hard drive or partition that has Windows installed on it – usually C:), and enter an Initial size and Maximum size for your virtual memory:
- Initial size – This value varies, depending on your computer. If you’re not sure what value to use, just enter whatever the number is in theRecommended category.
- Maximum size – Don’t set this value too high. It should be about 1.5 times the size of your physical RAM. e.g. A PC with 4 GB (4096 MB) of RAM should have no more than about 6,144 MB virtual memory (4096 MB x 1.5).
Once you’ve entered your virtual memory values, click Set , then click OK to continue.
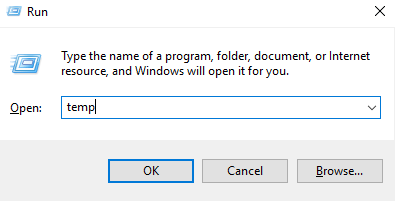
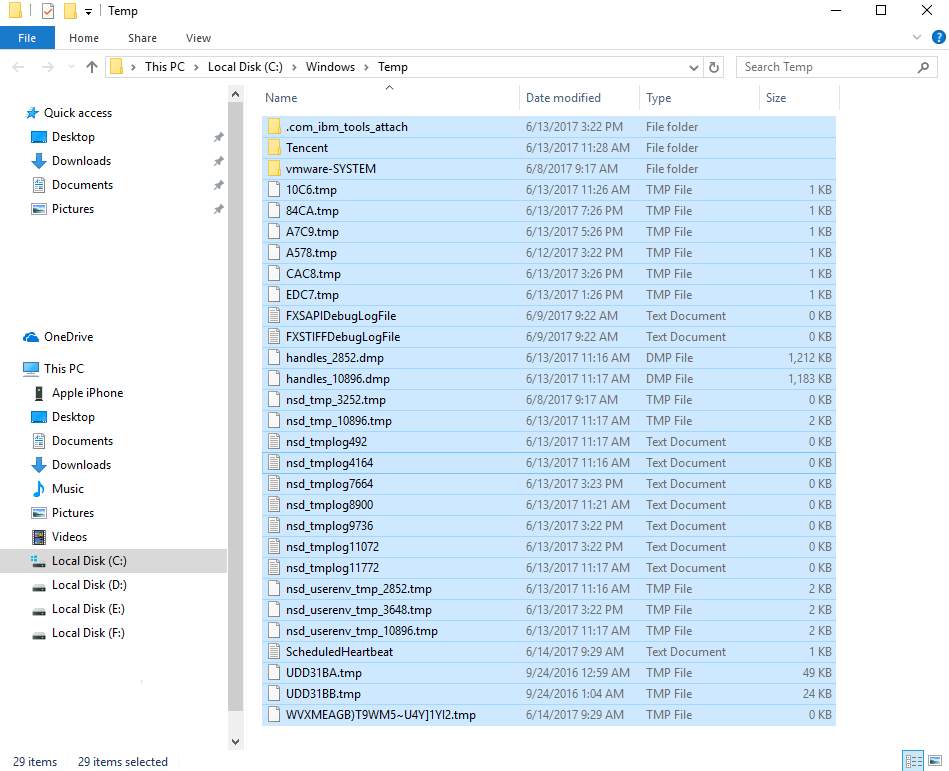
- Clear all your computer’s ‘temp’ files. On your keyboard, pressWindows key andR at the same time, then in the Run form, typetemp and hitEnter . This will invoke Windows Explorer with your Temp folder open, showing you all the temp files on your computer.
- Select all the files in the Temp folder and delete them.
- Check your computer’s disk usage: Type “task manager” in the Windows search bar and selectTask Manager , then in the Processes tab, look at the % at the top of the Disk column. If it’s no longer 100%, you’ve fixed the problem!
If the 100% disk usage problem persists, try the next method, below.
Fix 6: Disable Antivirus Software temporarily
If you’ve installed antivirus or anti-malware programs such as Norton, Kaspersky, AVG, Avast Behavior Shield or Malwarebytes, you shouldtemporarily turn them off or disable them to see if they’re causing your disk usage problem.
Please see your antivirus software’s documentation to learn how to disable it. You might also find these links useful:
- How to temporarily turn off Norton Antivirus program?
- How to stop AVG temporarily?
- How to disable Avast temporarily?
Note that Microsoft has its own default anti-malware,Windows Defender . It’s automatically enabled even if you also have other antivirus applications installed. Even if you disable your other antivirus programs, Windows Defender is always there for you during that certain time range. So, no need to worry too much about temporarily turning antivirus off.
Once you’ve disabled your antivirus , check your computer’s disk usage again: Type “task manager” in the Windows search bar and selectTask Manager , then in the Processes tab, look at the % at the top of the Disk column. If it’s no longer 100%, you’ve found the problem, and you should contact the vendor of your antivirus software to see if they can provide some help.
If the 100% disk usage problem persists, try the next method, below.
Fix 7: Fix your StorAHCI.sys driver
Note : A million thanks to our warm-hearted reader Javier for the following solution.
The Windows 10 100% disk usage problem might also be caused by some Advanced Host Controller Interface PCI-Express (AHCI PCIe) models running with the inboxStorAHCI.sys driver due to a firmware bug.
Here’s how to determine if this is your problem and fix it:
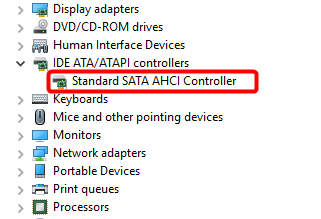
- Open Device Manager by pressingWindows logo key andX at the same time to chooseDevice Manager .

- Expand the IDE ATA/ATAPI Controllers category, and double-click theAHCI controller .
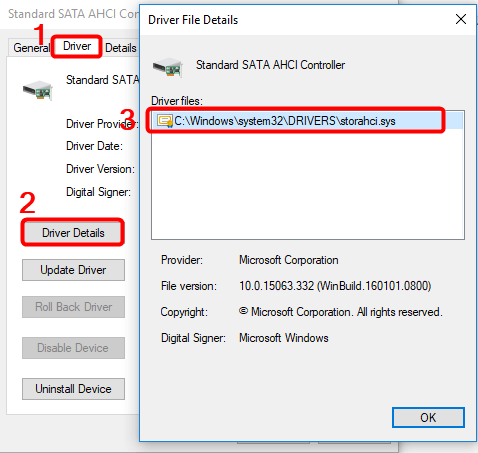
- Go to the Driver tab and clickDriver Details . If you can seestorahci.sys stored in a path of system32 folder, then you are running the inbox AHCI driver.
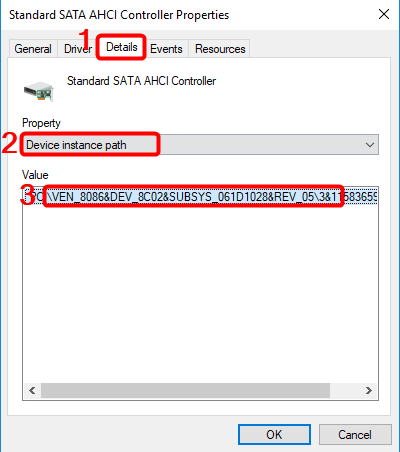
- Close the Driver Details window and go toDetails tab. From the drop-down menu, select Device Instance Path . Make note of the path, starting fromVEN_ .
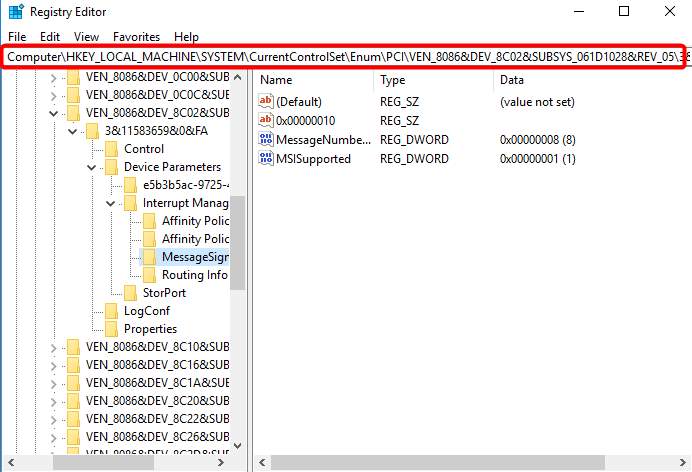
- Typeregedit in the search box ofStart panel, then hitEnter on your keyboard to run Registry Editor. Then go to:
HKEY_LOCAL_MACHINE \ System \ CurrentControlSet \ Enum \ PCI \ < AHCI Controller > \ < Random Number > \ Device Parameters \ Interrupt Management \ MessageSignaledInterruptProperties
The < AHCI Controller > here refers to the name you see from step 2).
The < Random Number > differs on different machines.
- Double click theMSISupported key and change the value to0 .
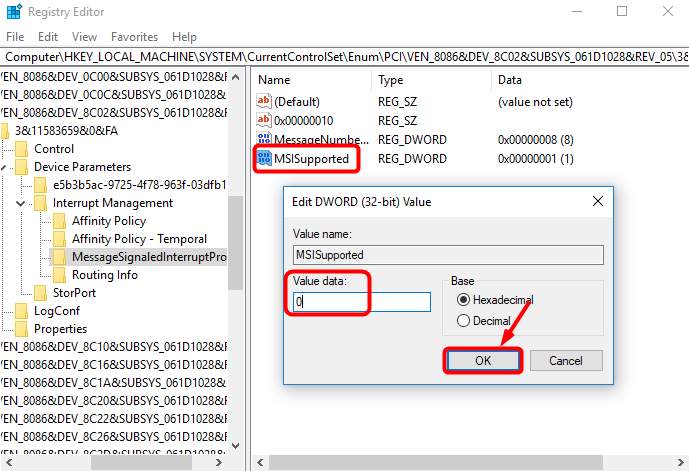
- Restart your computer after the change, then check your computer’s disk usage: Type “task manager” in the Windows search bar and selectTask Manager , then in the Processes tab, look at the % at the top of the Disk column. If it’s no longer 100%, you’ve fixed the problem!
Fix 8: Check the health of your disk
You should also check if it’s a hardware problem, which could help you locate the culprit. You don’t need to be a professional to check for disk health, there’re solutions like HD Tune and CrystalDiskInfo in place that can help you find out the stats of your disk.
Here’s how you can check the disk health easily with HD Tune:
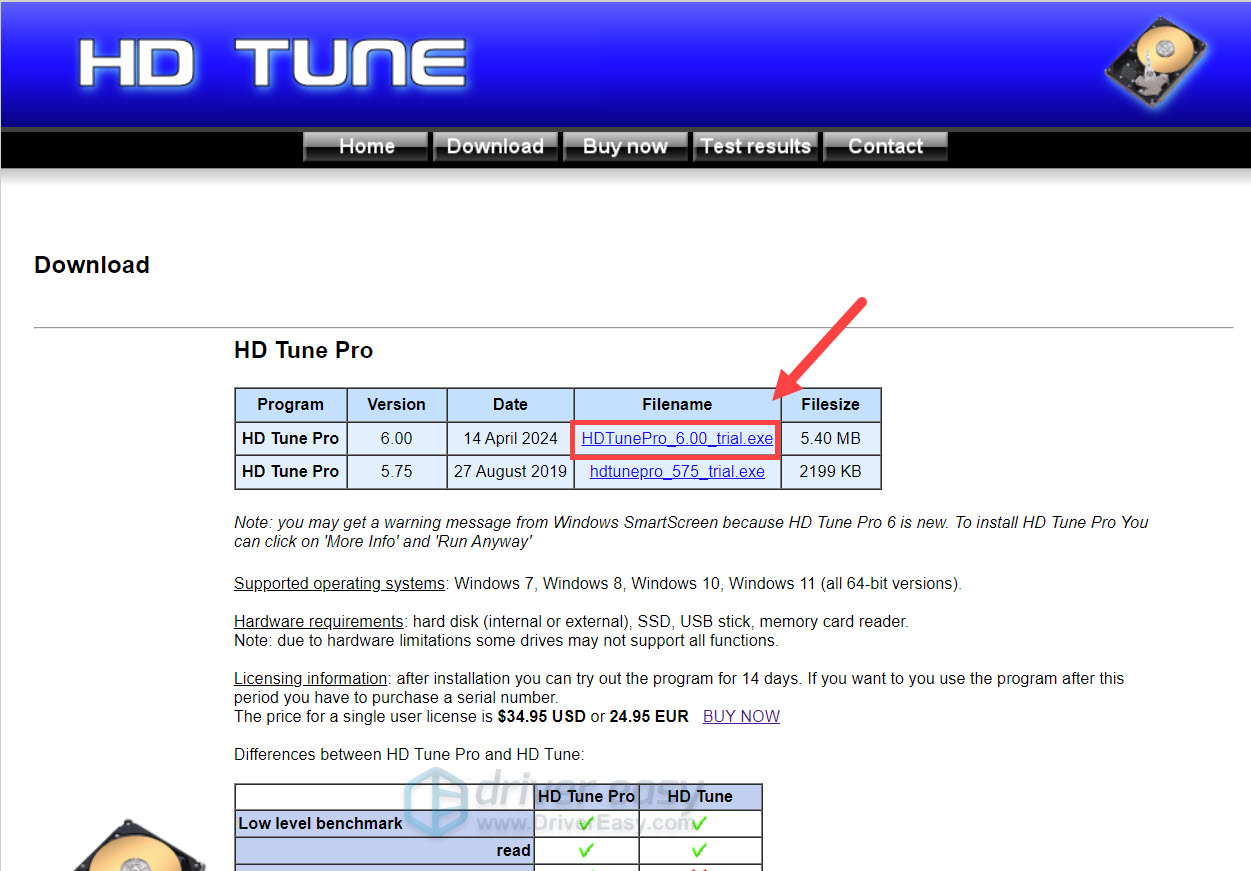
- Download and install the latest version of HD Tune.
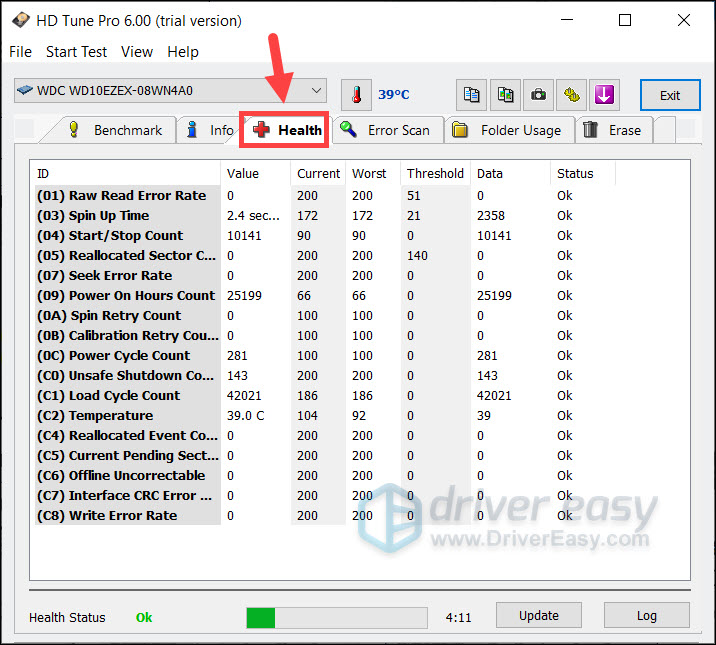
(The trial version is enough for troubleshooting. You can get a license if you want to learn more about the disk’s performance.) - Launch HD Tune. Select theHealth tab.
Here you can see the S.M.A.R.T info of your disk. (S.M.A.R.T is a monitoring system providing a series of attributes or diagnostics for each disk model.) At this moment, you don’t need to figure out each entry’s meaning — simply check if there’s any one of them has aStatus that is not “Ok “. If you see a warning, you may need to google the entry label and determine your next step. - On the top left corner, you can toggle the drop down menu to select the disk (if you have multiple). This will allow you to check the health of each disk.
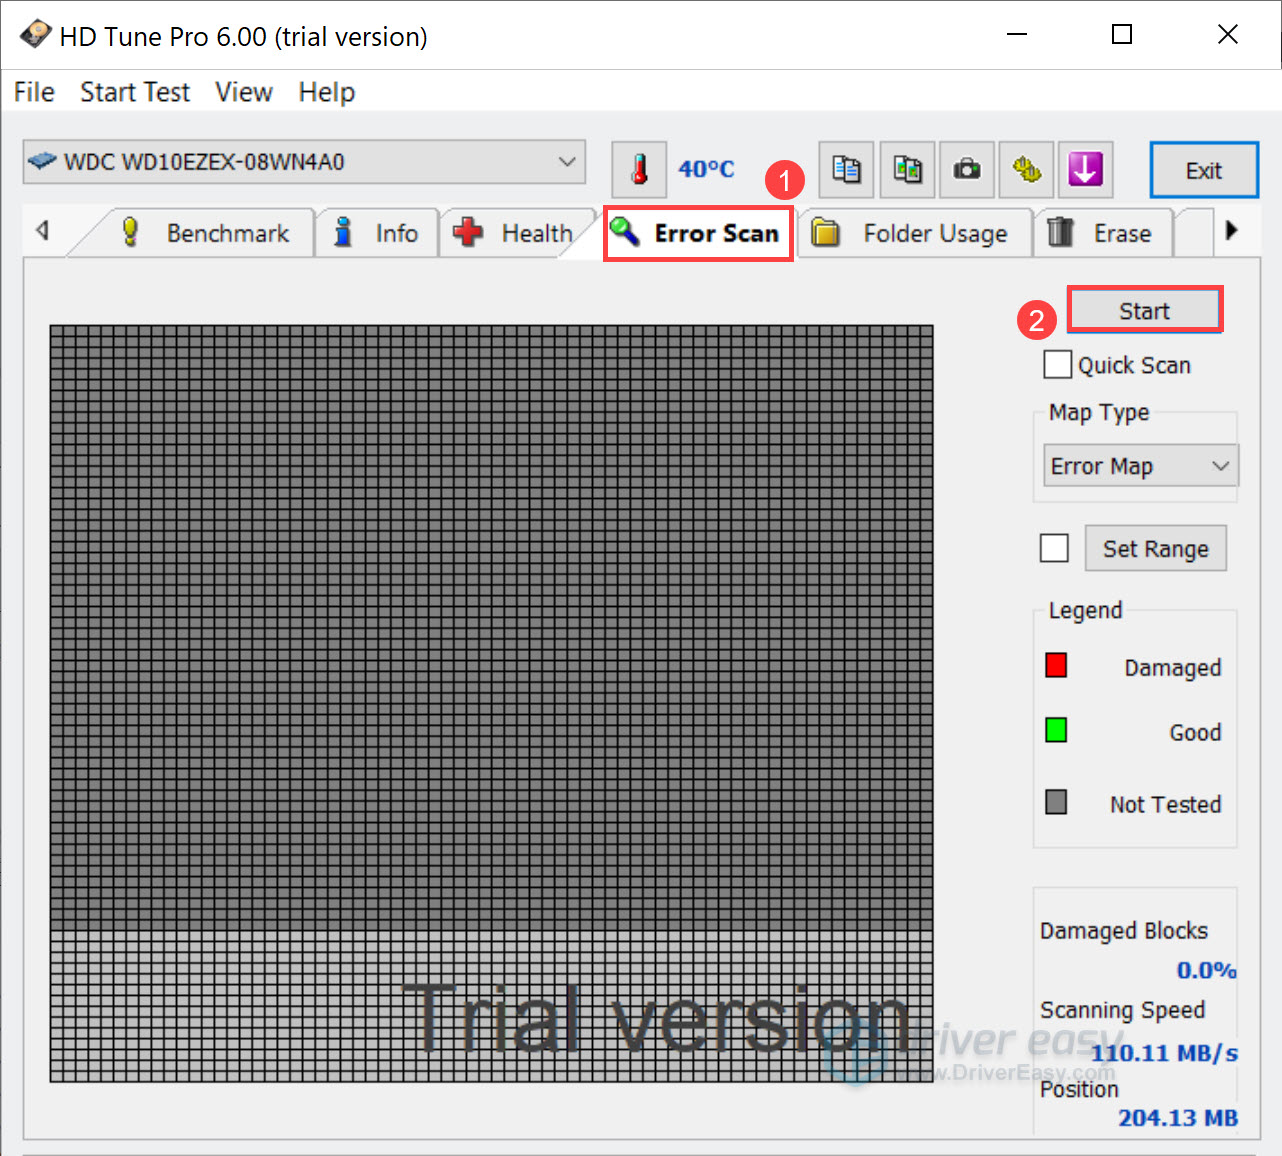
You’d also need to check if the disk has bad blocks. Before you start, note that this process could take hours to complete. You may want to try other fixes before this one.
- In HD Tune, select theError Scan tab. First make sure theQuick Scan checkbox is unchecked. Then clickStart .
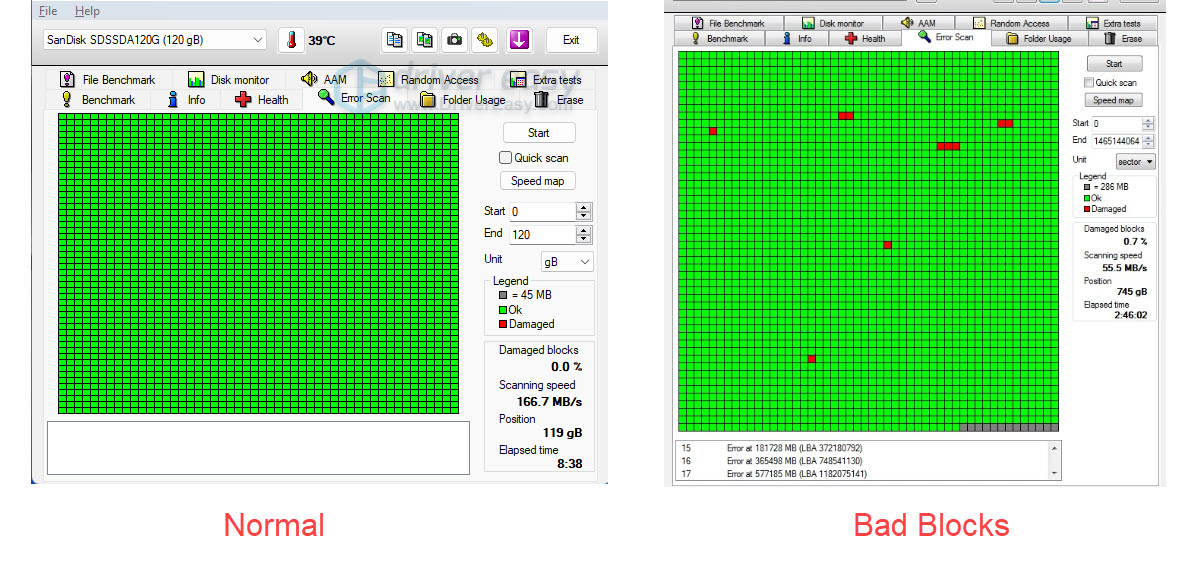
- Once it completes, check the graph and look for yellow or red blocks. If there’re any red (damaged) blocks, you should consider backing up your data and replace the faulty disk.
3. Again, you can use the drop down menu on the top left corner to scan different disk. It’s recommended you scan all the disk to make sure all your hard drives are in good condiction.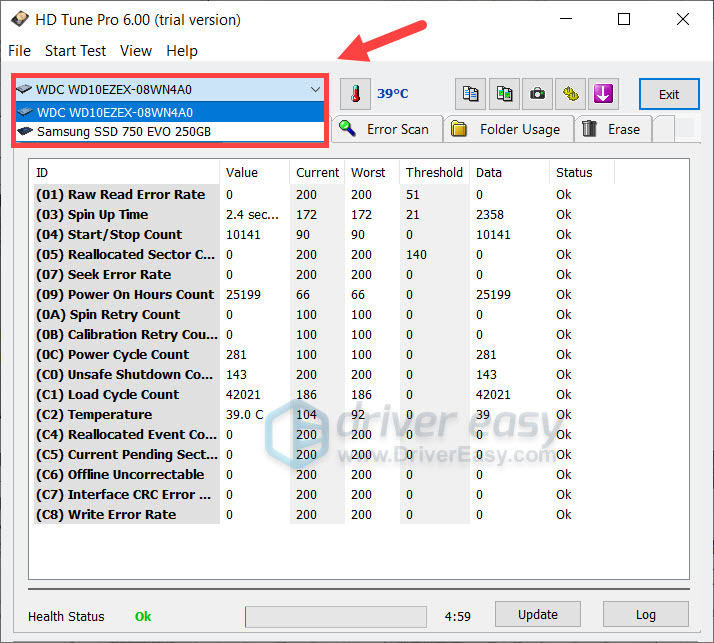
Tips to secure your data : Since hard drives have a finite lifetime and can fail without a warning, consider using a free backup software like AOMEI Backupper to create a system image , especially when the disk carries important data. A backup system protects you against random disk failures.
Fix 9: Switch to ChromeOS
Windows is a very old technology. Sure, Windows 10 is relatively new, but it’s still just the latest iteration of a decades-old operating system, designed for a bygone era (pre-internet).
Now that we have the internet, fast connection speeds, free cloud storage, and endless web apps (like Gmail, Google Docs, Slack, Facebook, Dropbox and Spotify), the entire Windows way of doing things – with locally installed programs and local file storage – is totally outdated.
Why is that a problem? Because when you’re constantly installing uncontrolled third-party programs, you’re constantly opening the door to viruses and other malware. (And Windows’ insecure permission system compounds this problem.)
Plus the way Windows manages installed software and hardware has always been a problem. If your computer shuts down unexpectedly, or a program installs, uninstalls or updates incorrectly, you can get ‘registry’ corruptions. That’s why Windows PCs always slow down and become unstable over time.
Also because everything’s installed and saved locally, it doesn’t take long before you run out of disk space, and your disk gets fragmented, which makes everything even slower and more unstable.
For most people, the simplest way to solve Windows problems is to ditch Windows altogether, and switch to a faster, more reliable, more secure, easier to use and cheaper operating system…
ChromeOS feels much like Windows, but instead of installing heaps of programs to email, chat, browse the internet, write documents, do school presentations, create spreadsheets, and whatever else you normally do on a computer, you use web apps. You don’t need to install anything at all.
That means you don’t have virus and malware problems, and your computer doesn’t slow down over time, or become unstable.
And that’s just the start of the benefits…
To learn more about the benefits of ChromeOS, and to see comparison videos and demos,visit GoChromeOS.com .
Also read:
- [New] 2024 Approved From Novice to Pro Mastering the Art of YouTube Shorts
- [New] Seamless Audio Integration in Instagram Visuals & Stories for 2024
- [Updated] 2024 Approved Panoramic Portals Cutting-Edge Filmscapes
- [Updated] Cutting-Edge Techniques for Efficient HP Notebook Screen Recording
- DevMgr: Error Code 48 Addressed
- How to Delete User Profile in Windows 10 - RevoUninstaller
- How to Sidestep DirectX 9 Initialization Snags
- In 2024, 5 Easy Ways to Copy Contacts from Vivo V27 to iPhone 14 and 15 | Dr.fone
- IPhone Cinematic Techniques Top 8 Strategies for Ultimate Video Quality
- Pioneering Proficiency The Complete Guide to Music & Media Fusion on YouTube for 2024
- Resolved Intermittent ASUS Webcam on Win11 Platform
- Solving the 'Windows 10 Co-Processor Driver Not Found' Problem with Ease: An In-Depth Guide
- Techniques to Overcome eNEX Driver Launch Issue in Win11
- Universal Compatible PCI Device Suite
- Why cant I install the ipogo On Apple iPhone SE | Dr.fone
- Windows 11 and GTX 950 Code 43 Error: A Detailed Guide to Finding a Solution
- Xbox One Controller Unresponsive to Windows 10 Home [Resolved]
- Title: Full Disk Alert in Windows 10 Task Manager
- Author: Kenneth
- Created at : 2024-11-26 02:53:44
- Updated at : 2024-12-02 23:15:22
- Link: https://driver-error.techidaily.com/full-disk-alert-in-windows-10-task-manager/
- License: This work is licensed under CC BY-NC-SA 4.0.