
How to Link Unifying Hub with New OSes Successfully
How to Link Unifying Hub with New OSes Successfully
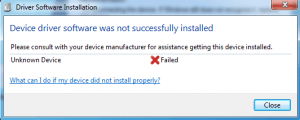
If you have a Logitech wireless mouse, and you get a message saying Device driver software was not successfully installed when you plug your unifying receiver into your PC, you’re not alone. Many Windows are reporting this problem as well. But no worries, this is not at all a hard problem to fix.
If you’re bugged by this problem, no worries. Many Windows users are able to resolve it with one of the following solutions. You may not have to try them all; just work your way down until you find the one that works.
Try these fixes, one at a time
- Copy the driver file from a well-functioning computer
- Remove possible conflict applications
- Update mouse and USB drivers
- Run Logitech Unifying Receiver as administrator
- Perform a hard reset
You should get a working mouse or touchpad to do the instructions below. The following screenshots are shown on Windows 11, but all the fixes apply to Windows 10, and 8&7 as well.
1: Copy the driver file from a well-functioning computer
If your current PC lacks the needed driver file, your mouse receiver won’t work as well as it should. To fix it:
- Go to C:\Windows\inf\ to find theusb.PNF andusb.inf files. If you can see them on your current PC, then move on to the methods below.
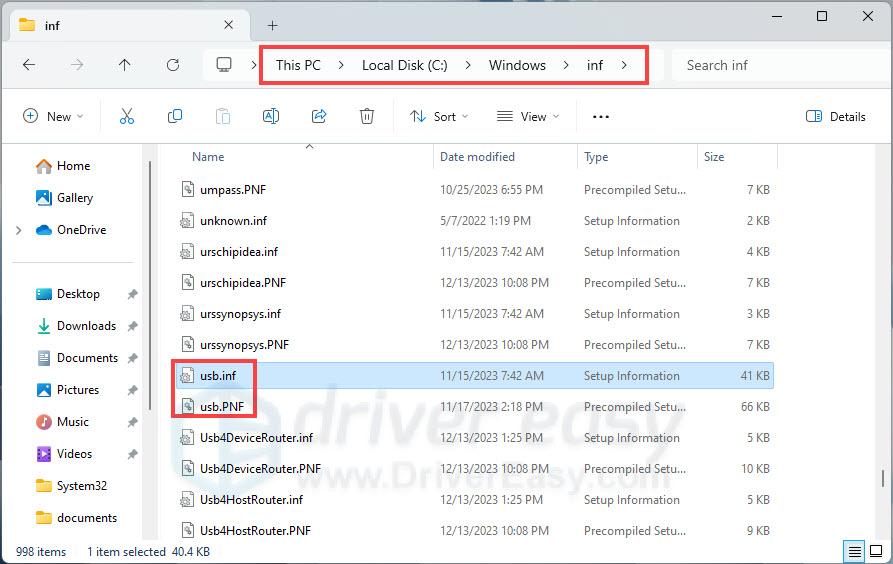
If you can’t see them,copy them from another computer whose USB receiver is working properly and paste them onto this folder.
If you don’t have another computer, see if you can find them via this pathC:\Windows\ System32 .
If you can find theusb.inf andusb.PNF files, still, copy and paste them to the folder C:\Windows\inf\ .
2: Remove possible conflict applications
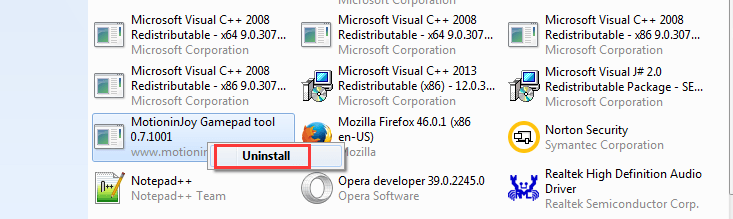
If you have MotionInJoy installed on your PC, it could be the culprit. It’s reported to conflict with Logitech unifying receiver. You can remove it:
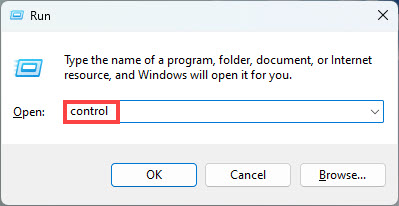
- On your keyboard, hold down the Windows logo key and press R to open the Run window. Then type incontrol and hit Enter to open theControl Panel .
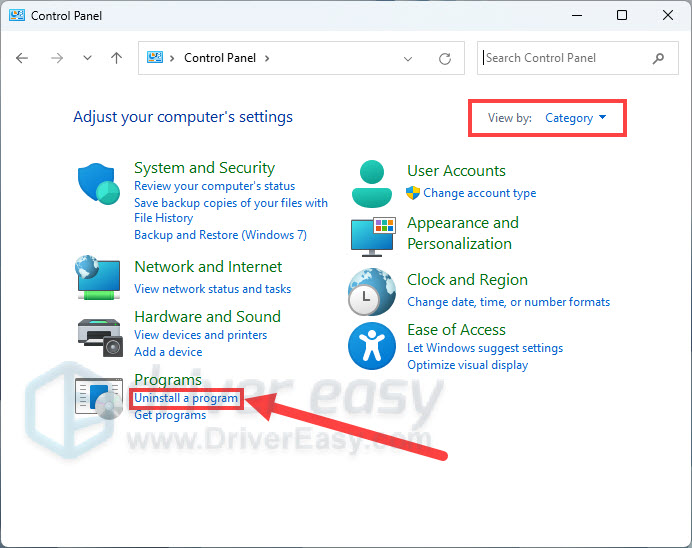
- View byCategory and click Uninstall a program .
- Right-lick MotionInJoy and click Uninstall .
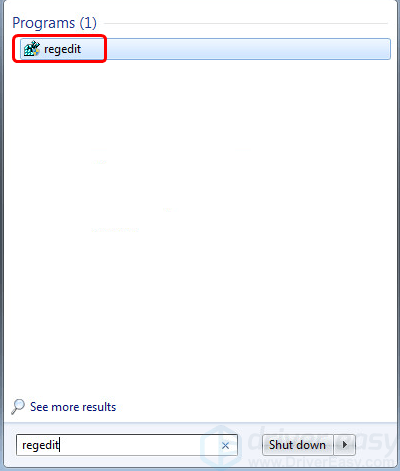
- Type inregedit in the search bar and then open it.
- On your keyboard, press the Ctrl key and F at the same time to open a search window. Type DS3 .
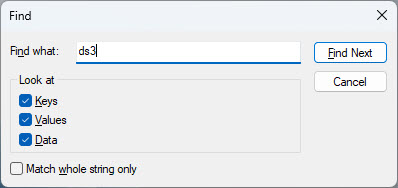
- Delete all the DS3 files that you can see, especially the DS3.exe file.
Unplug yourLogitech Unifying Receiver .
Restart your computer and then plug in your Logitech Unifying Receiver.
Wait for Windows Update to help you find the correct driver.
3: Update Mouse and USB Drivers
One of the most common causes of an unresponsive keyboard is an outdated mouse or USB driver.
There are two ways you can get the right drivers for your mouse and USB port: manually or automatically.
Manual driver update – You can update your drivers manually by going to the manufacturer’s website and searching for the most recent correct driver. Note that for your USB driver, you may need to try both the manufacturer of your PC and also the manufacturer of your USB port’s chipset. Be sure to choose only drivers that are compatible with your variant of Windows 10.
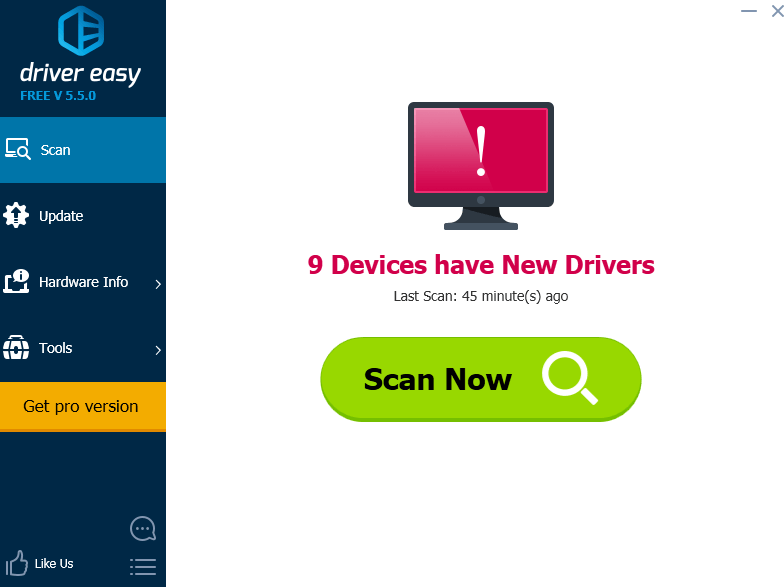
Automatic driver update – If you don’t have the time, patience or computer skills to update your drivers manually, you can, instead, do it automatically with Driver Easy . Driver Easy will automatically recognize your system and find the correct drivers for your exact mouse and USB port, and your variant of Windows 10, and it will download and install them correctly:
1)Download and install Driver Easy.
- Run Driver Easy and click theScan Now button. Driver Easy will then scan your computer and detect any problem drivers.
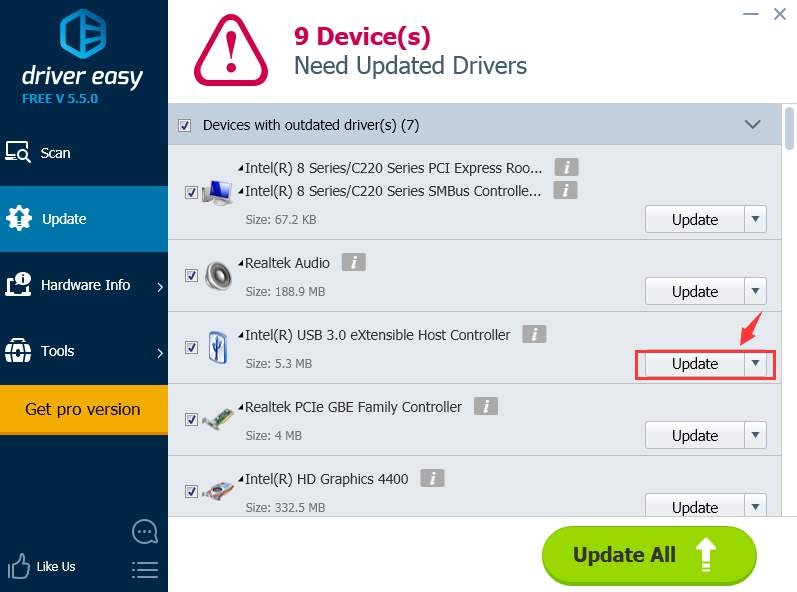
- Click theUpdate button next to the flagged mouse device and/or USB port to automatically download and install the correct version of that driver (you can do this with the FREE version).
Or clickUpdate All to automatically download and install the correct version of all the drivers that are missing or out of date on your system (this requires the Pro version – you’ll be prompted to upgrade when you click_Update All_ ).
4: Run Logitech Unifying Receiver as administrator
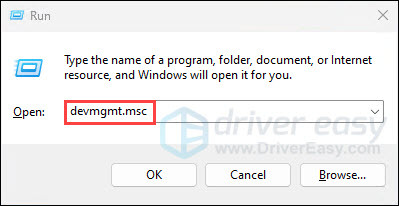
- On your keyboard, press theWindows logo key andR at the same time. Typedevmgmt.msc and pressEnter .
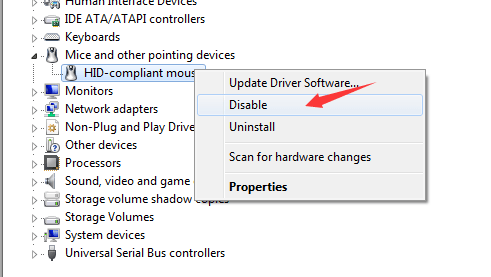
- Expand Mice and other pointing devices, right-click theHID-compliant mouse and click Disable .
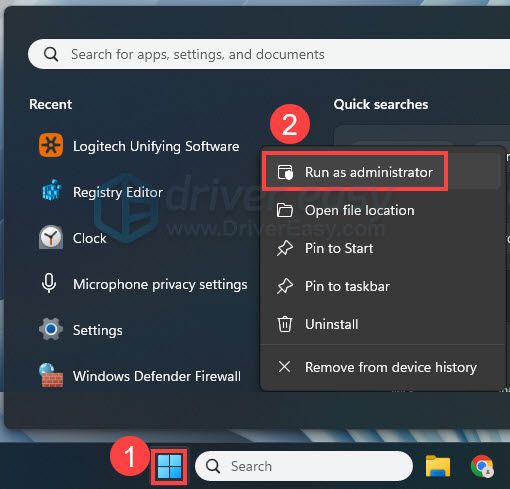
- Download Logitech Unifying Software . After the download, right-click the icon and click Run as administrator .
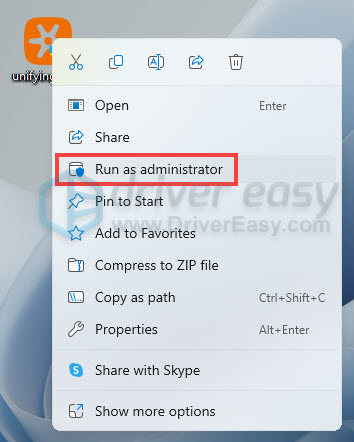
- After the installation, right-clickLogitech Unifying Software in theStart panel and click Run as administrator .
- Your Logitech receiver should be able to work now.
5: Perform a hard reset
Note: When performing ahard reset , you must disconnect or remove all peripheral devices. You should start and test the computer by itself, and then reconnect one peripheral device at a time.
1)Turn off your computer.
Remove the computer from any port replicator or docking station.
Disconnect all external connected peripheral devices such as USB storage devices, external displays, and printers.
Unplug the AC adapter from the computer.
Remove the battery from the battery compartment(If you are using a laptop).
Press and hold down thePower button for about 15 seconds to drain any residual electrical charge from the capacitors that protect the memory.
Insert the battery and plug the AC adapter back into the notebook computer, but do not connect any of the peripheral devices.
Press thePower button to turn on the computer.
If a startup menu opens, use the arrow keys to selectStart Windows Normally , and then press theEnter key.
After reconnecting each of the peripheral devices, runWindows Update to update all device drivers.
Also read:
- [New] 2024 Approved IPhone's Guide to Spherical Videos on Facebook Platform
- 10 Must-Have Features for Optimal Free SRT Tools
- Download & Update Guide for the Canon XC10 Video Camera System
- DVD再生可能なWii:任天堂ゲーム機が持つ秘密の強み
- Frontier Gadgets Galore Top 10 VR Accessories for 2024
- HDR Audio Hub: No More Glitches
- How to Fix Qualcomm Atheros Bluetooth Issues on Windows 10
- Resolving the Issue: Unrecognized or Invalid Drivers Installation on Your PC
- Xbox 360 Controller Driver Not Working on Windows 10 [Solved]
- Title: How to Link Unifying Hub with New OSes Successfully
- Author: Kenneth
- Created at : 2024-11-17 03:41:50
- Updated at : 2024-11-24 02:20:34
- Link: https://driver-error.techidaily.com/how-to-link-unifying-hub-with-new-oses-successfully/
- License: This work is licensed under CC BY-NC-SA 4.0.