
Resolving the 'Missing Coprocessor Driver' Issue in Windows 10: A Step-by-Step Guide
Resolving the ‘Missing Coprocessor Driver’ Issue in Windows 10: A Step-by-Step Guide
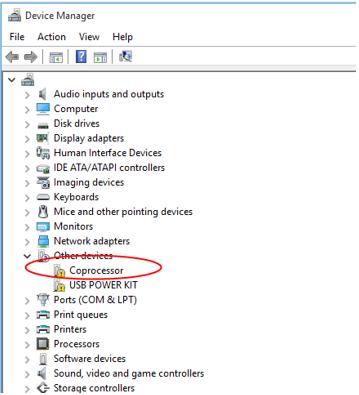
After you upgraded your system to Windows 10 from Windows 7 or Windows 8, you might find your computer run slowly. Then you checked for the driver status in Device Manager, and saw a device namedCoprocessor with a yellow exclamation mark next to it. You have no idea what the device is and how to remove the yellow mark. Don’t worry. You can fix this driver issue with the methods in this post.
The Coprocessor with a yellow mark in Device Managermeans there is problem with chipset driver , mostly Nvidia nForce chipset driver. To fix the problem, you just need to update the chipset driver.
There are two simple methods to update the chipset driver. You can try both of them until you resolve the problem.
Method 1: Update the driver manually via Device Manager
When you have driver problems like chipset driver issues, you can update the driver from Windows easily. You can update the driver via Windows Update or Device Manager. Then you don’t need to go to manufacturer’s website to check for the latest driver. Since you know how to open Device Manager, you can update the driver via Device Manager.
It’s possible that Windows doesn’t provide the latest driver. If you’ve tried this method but it doesn’t work for you, try Method 2.
To update the Coprocessor driver in Device Manager, you just need to follow steps below (Following screen shots are just for your reference.):
OpenDevice Manager .
Double click Coprocessor to open the driver Properties window.
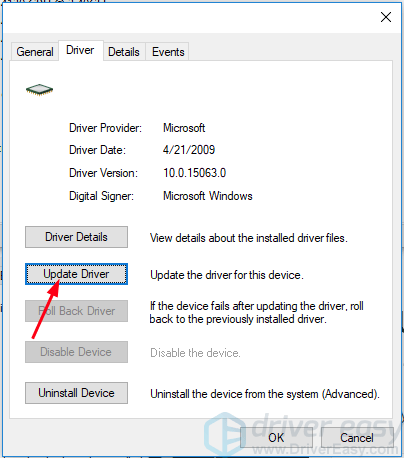
Go toDriver tab and clickUpdate Driver .
- ClickSearch automatically for updated driver software .
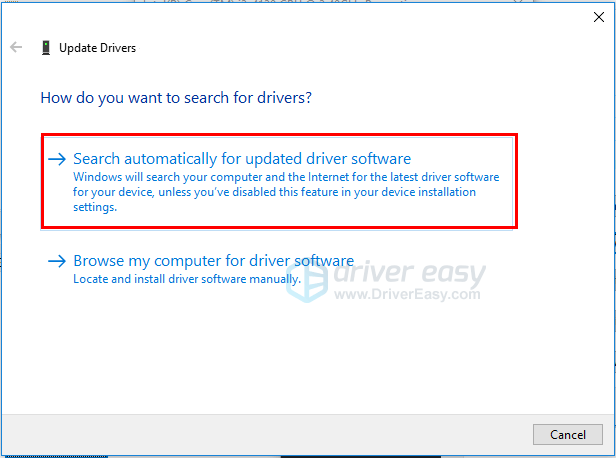
- After the updating completes, check to see if you still see Coprocessor with a yellow mark in Device Manager.
Method 2: Update the driver automatically using Driver Easy
Method 1 may resolve the problem, but if it doesn’t, or you’re not confident playing around with drivers manually, you can do it automatically with Driver Easy .
Driver Easy will automatically recognize your system and find the correct drivers for it. You don’t need to know exactly what system your computer is running, you don’t need to risk downloading and installing the wrong driver, and you don’t need to worry about making a mistake when installing.
You can update your drivers automatically with either the FREE or the Pro version of Driver Easy. But with the Pro version it takes just 2 clicks (and you get full support and a 30-day money back guarantee):
Download and install Driver Easy.
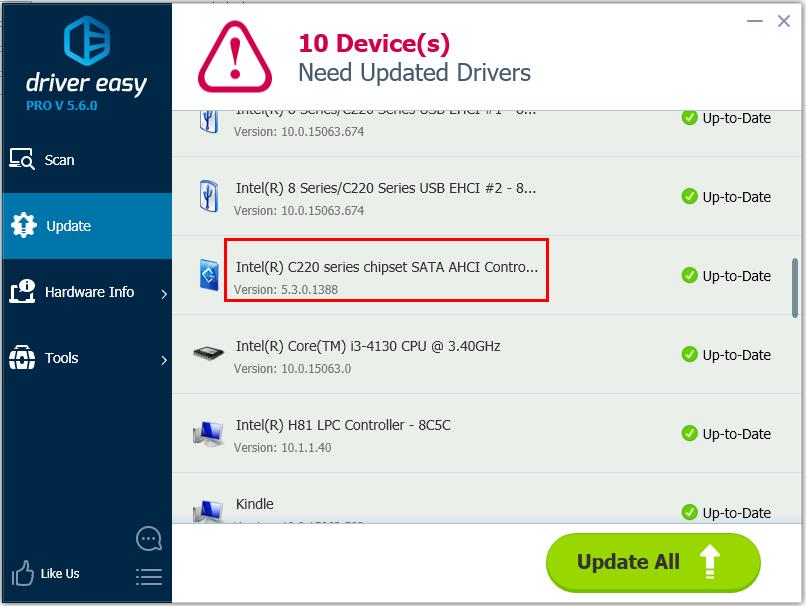
Run Driver Easy and click Scan Now . Driver Easy will then scan your computer and detect any problem drivers.

- Click the Update button next to a flagged chipset driver to automatically download and install the correct version of this driver (you can do this with the FREE version).
Or click Update All to automatically download and install the correct version of all the drivers that are missing or out of date on your system (this requires the Pro version – you’ll be prompted to upgrade when you click Update All).
- After updating the driver, check to see if you still see Coprocessor with a yellow mark in Device Manager.
Hope you can fix the Coprocessor driver issue in Windows 10 easily with the methods above. If you have any questions or ideas, please leave your comment below. 😛
Also read:
- [New] Ultimate Virtual World Cinema Lineup
- [Updated] 2024 Approved Reduce Audio Noise in Video Recording [Free and Paid]
- 2024 Approved Android & iPhone's Leading Social Apps to Skyrocket Likes on FB
- AI-Assisted Adventure Crafting: Top 6 Strategies with ChatGPT
- Elan Touchpad Driver Issues in Windows 11 [Solved]
- Enabling Seagate Drives on New Windows 11 OS
- Enhanced Recording Quality: Fixed Windows 10 ASUS Cam Issue
- Hacking Into Windows 11'S Theme Limitations Using Registry
- How To Activate and Use Life360 Ghost Mode On Itel P55 5G | Dr.fone
- In 2024, Here are Some of the Best Pokemon Discord Servers to Join On Vivo V29 | Dr.fone
- Overcoming the 'Device Misconfigured' Hurdle - Resolving Code 1 Issues
- Overcoming VEN_INT&DEV_33A0 Acpi Challenges
- Resolution: Fixing Invalid INF Install Section
- Seamless Conversion of Mobile to Desktop: Android Webcams in Windows 11
- Simple Solutions: Eliminate That Unwanted Buzz in Audio Equipment
- Successfully Solving the Missing CPU Module Driver Problem for Windows 11 Users
- The Complete Tutorial: Upgrading and Downloading Drivers for HP's Envy 13, 15, and 17 Series Computers
- Title: Resolving the 'Missing Coprocessor Driver' Issue in Windows 10: A Step-by-Step Guide
- Author: Kenneth
- Created at : 2025-02-18 16:02:58
- Updated at : 2025-02-19 17:35:06
- Link: https://driver-error.techidaily.com/resolving-the-missing-coprocessor-driver-issue-in-windows-10-a-step-by-step-guide/
- License: This work is licensed under CC BY-NC-SA 4.0.